
Manual Gearbox Stop Leak: A Comprehensive Guide (Updated 12/25/2025)
Navigating manual gearbox leaks requires careful diagnosis and repair; distinguishing between gearbox and engine leaks is crucial, especially in manual transmission vehicles.
Identifying the Source of the Leak
Pinpointing the leak’s origin is the first, and arguably most important, step. Often, what appears to be a gearbox leak could actually stem from the engine itself, particularly in vehicles with manual transmissions where proximity can make differentiation difficult. Thoroughly inspect the area around the gearbox, utilizing a bright light and, if possible, a mirror to access hard-to-reach spots.
Look for fresh oil drips or signs of older, accumulated residue. Clean the gearbox exterior with a degreaser to provide a clean surface for observation. Run the engine and transmission through various gears, noting when and where the leak becomes most apparent. Pay attention to whether the leak worsens with clutch engagement or during specific gear changes. This observation will provide valuable clues about the leak’s source and severity.
Common Leak Locations in Manual Gearboxes
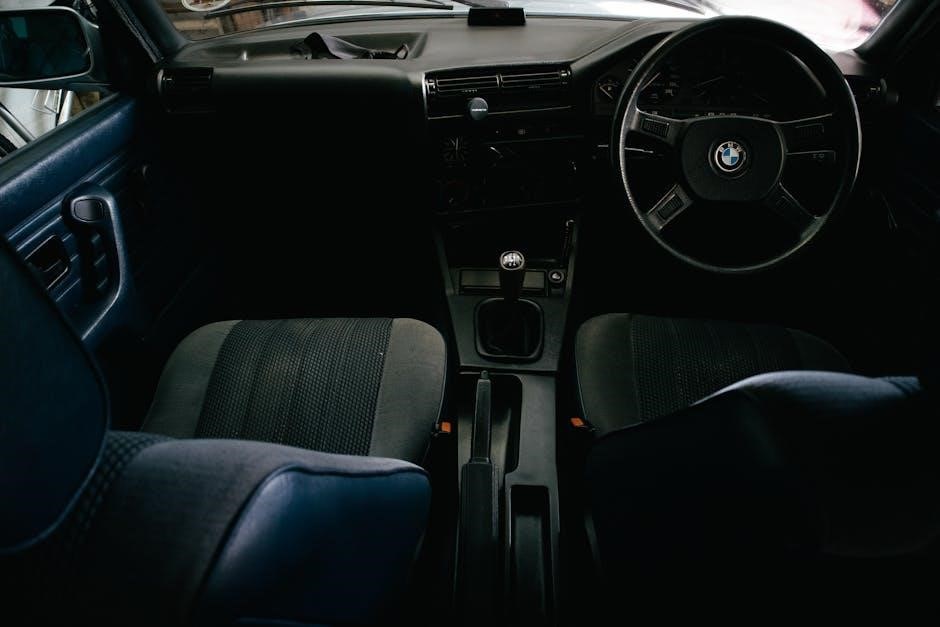
Manual gearboxes have several potential leak points, each requiring a specific repair approach. The front seal, or input shaft seal, is a frequent culprit, often leaking due to age and wear, especially if the clutch has been repeatedly engaged. Similarly, the rear seal, protecting the output shaft, is prone to deterioration over time and mileage.
Another common source is the side cover gasket, which seals the gearbox housing. This gasket can become brittle and leak due to heat cycles and general degradation. Inspect these areas meticulously during your leak source identification. Remember that multiple leaks can exist simultaneously, so a comprehensive inspection is vital for accurate diagnosis and effective repair.
Front Seal (Input Shaft Seal)
The front seal, or input shaft seal, prevents gear oil from escaping where the transmission input shaft exits the gearbox housing. Failure often manifests as oil dripping from the front of the transmission, near the engine. This seal is vulnerable to wear from constant rotation and potential contamination.

Repeated clutch engagement can accelerate wear, as the input shaft experiences increased movement. Diagnosing a front seal leak requires careful observation, differentiating it from engine oil leaks. Replacement typically involves removing the transmission, accessing the seal, and carefully installing a new one, ensuring proper lubrication during installation to prevent premature failure.
Rear Seal (Output Shaft Seal)
The rear seal, also known as the output shaft seal, prevents gear oil leakage where the transmission output shaft exits the gearbox. A failing rear seal typically results in oil being flung onto the driveshaft, differential, or surrounding components, creating a noticeable mess. Identifying this leak involves inspecting the rear of the transmission and the driveshaft for oil residue.
Like the front seal, the rear seal is subject to wear and tear from continuous rotation. Replacement necessitates removing the driveshaft, carefully extracting the old seal, and installing a new one with appropriate sealant and lubrication. Proper alignment is critical to prevent future leaks and ensure long-term reliability.
Side Cover Gasket
The side cover gasket seals the gearbox housing, preventing oil from escaping at the seam where the side cover attaches. Leaks from this area are often visible as oil pooling along the side of the transmission case. Identifying a side cover gasket leak requires a thorough visual inspection, often cleaning the area to pinpoint the exact source.
Replacing the side cover gasket involves removing the side cover, carefully cleaning the mating surfaces, and installing a new gasket, often with a sealant for added protection. Ensuring proper torque specifications during reassembly is crucial to avoid future leaks and maintain the structural integrity of the gearbox.
Types of Gear Oil & Their Viscosity
Selecting the correct gear oil is paramount for optimal manual gearbox performance and leak prevention. Gear oils are categorized by viscosity, typically denoted by SAE grades like 75W-80, 75W-90, and 80W-90. The “W” indicates winter performance, with lower numbers signifying better cold-weather fluidity.
Mineral oils are traditional, cost-effective options. Synthetic oils offer superior thermal stability, shear resistance, and extended drain intervals. Semi-synthetic blends provide a compromise between cost and performance. Viscosity impacts lubrication; too thin, and protection diminishes; too thick, and shifting becomes difficult. Always consult your vehicle’s manual for the recommended gear oil specification.
Understanding Gear Oil Additives & Leak-Stopping Properties
Modern gear oils contain additives enhancing performance and potentially mitigating minor leaks. Extreme pressure (EP) additives protect gears under heavy loads, while anti-wear agents reduce friction and extend component life. Corrosion inhibitors prevent rust, and detergents keep the gearbox clean.
Some oils include seal conditioners, designed to swell seals and temporarily reduce leakage. However, these are often a temporary fix and may not address the root cause. Viscosity index improvers maintain consistent viscosity across temperature ranges. While additives can help, severely worn or damaged seals require replacement, as additives offer limited long-term solutions.
Temporary Stop Leak Additives: Pros & Cons
Stop leak additives offer a quick, inexpensive solution for minor gearbox leaks, potentially saving immediate repair costs. They can temporarily swell seals, reducing seepage and extending the time before a full repair is necessary. This is beneficial for vehicles nearing disposal or during temporary financial constraints.
However, significant drawbacks exist. Additives can compromise the oil’s lubricating properties, potentially accelerating wear on gears. They mask the underlying problem, allowing damage to worsen undetected. Furthermore, some additives can react negatively with certain seal materials, causing further deterioration. Consider them a temporary band-aid, not a permanent fix.
Effectiveness of Stop Leak Additives
The effectiveness of stop leak additives varies greatly depending on the leak’s source and severity. Minor seepage from slightly dried seals may respond temporarily, as the additive can re-swell the rubber. However, significant leaks caused by damaged seals, worn components, or cracks will likely see minimal improvement.
Additives are most effective on older vehicles where seals have gradually lost pliability. Newer gearboxes with mechanical damage won’t benefit. Expect a temporary reduction in visible leakage, but don’t anticipate a complete stop. The additive’s polymers attempt to fill small gaps, but cannot repair substantial damage. Monitoring the leak after application is crucial to assess its limited impact.
Potential Risks of Using Stop Leak Additives
While seemingly convenient, stop leak additives carry potential risks for your manual gearbox. The polymers within can swell seals, which might initially stop a leak, but can also lead to premature failure of other seals within the system. This creates a larger, more complex problem down the line.
Additives can alter the gear oil’s viscosity, potentially affecting shifting performance and increasing internal friction. In some cases, they can even clog oil passages, leading to inadequate lubrication and component wear. Compatibility with your specific gear oil is vital; incorrect additives can cause chemical reactions and further damage. Consider these risks before opting for a temporary fix.
Diagnosing the Severity of the Leak
Accurately assessing the leak’s severity is crucial before proceeding with any repair. Begin by observing the rate of fluid loss – a few drops after driving versus a steady drip requires different approaches. Note the color and consistency of the fluid; gear oil is typically amber or brown, unlike engine oil.
Inspect the surrounding areas for fluid splatter, indicating the leak’s origin. A small seep might be manageable with an additive, but a significant leak demands immediate attention. Monitor fluid levels regularly to gauge the leak’s progression. Ignoring a severe leak can lead to catastrophic gearbox failure and costly repairs, so prompt diagnosis is key.
Tools and Materials Needed for Repair
Successful gearbox seal replacement demands the right tools and materials. Essential tools include a socket set, torque wrench, seal puller, and pry bars. You’ll also need various wrenches, screwdrivers, and potentially a gearbox jack for support.

Materials required encompass a new seal or gasket (specific to the leak location), gear oil (matching the manufacturer’s specification), brake cleaner for parts cleaning, and gasket sealant. Gloves, safety glasses, and a drain pan are vital for protection. Having rags and a workshop manual readily available will streamline the process, ensuring a professional and safe repair.
Replacing the Front Seal (Input Shaft Seal) ⎻ Step-by-Step
Begin by draining the gearbox oil completely. Disconnect the driveshaft and carefully remove it. Next, detach the starter motor for access. Using a seal puller, gently remove the old front seal, being cautious not to damage the housing.
Clean the sealing surface thoroughly with brake cleaner. Lightly lubricate the new seal’s inner lip with gear oil before carefully installing it using a seal driver or socket. Reassemble components in reverse order, ensuring proper alignment. Torque all bolts to the manufacturer’s specifications. Finally, refill the gearbox with the correct gear oil and check for leaks.
Replacing the Rear Seal (Output Shaft Seal) ⎻ Step-by-Step
Start by draining the gearbox oil completely and disconnecting the driveshaft. Support the gearbox securely before proceeding. Remove the rear cover plate, exposing the output shaft and seal. Carefully pry out the old rear seal, taking note of its orientation. Inspect the shaft for damage and replace if necessary.
Thoroughly clean the sealing surface and lightly lubricate the new seal’s inner lip with gear oil. Install the new seal using a seal driver, ensuring it’s seated correctly. Reattach the rear cover plate, tightening bolts to the specified torque. Reconnect the driveshaft and refill the gearbox with the appropriate oil. Check meticulously for any leaks after operation.
Replacing the Side Cover Gasket ⏤ Step-by-Step
Begin by draining the gearbox oil and disconnecting any components obstructing side cover access. Carefully remove the side cover, noting the gasket’s position and condition. Thoroughly clean both the cover and gearbox mating surfaces, removing all traces of old gasket material. Inspect the surfaces for warpage or damage; address any issues before proceeding.
Apply a thin, even bead of appropriate gasket sealant to both sides of the new gasket. Position the gasket accurately onto the gearbox and carefully reinstall the side cover. Tighten the cover bolts in a crisscross pattern to the manufacturer’s specified torque. Refill the gearbox with the correct gear oil and perform a leak check after a short test drive.
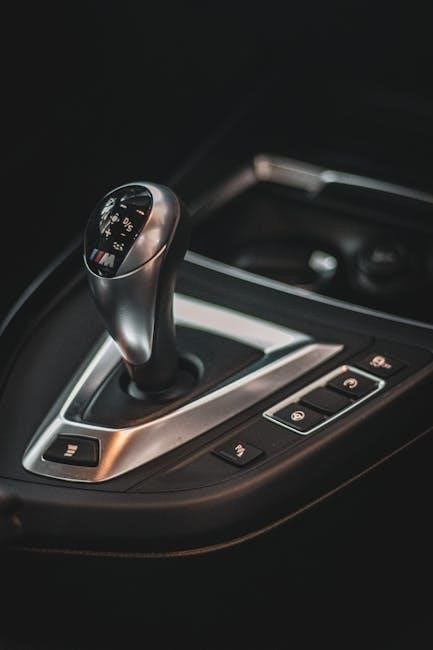
Torque Specifications for Gearbox Components
Precise torque application is vital during gearbox reassembly to prevent leaks and ensure proper function. Side cover bolts typically require 15-20 Nm (11-15 lb-ft), but always consult your vehicle’s service manual for exact values. Front and rear seal carrier plate bolts often need 25-35 Nm (18-26 lb-ft).
Differential carrier bolts demand higher torque, generally around 80-100 Nm (59-74 lb-ft). Ignoring these specifications can lead to gasket failure, seal damage, or even internal component breakage. Use a calibrated torque wrench for accurate measurements. Retorque bolts after an initial run to account for settling. Proper torque prevents distortion and maintains sealing pressure.
Gear Oil Refilling Procedure
After seal replacement, proper gear oil refilling is crucial. Locate the fill plug, usually on the side of the gearbox. Slowly pour in the recommended gear oil, using a funnel to avoid spills. The quantity varies by gearbox; consult your vehicle’s manual.
Check the oil level using the level plug, if equipped, or until oil begins to trickle out of the fill plug. Avoid overfilling, as this can cause pressure buildup and leaks. Use the correct gear oil viscosity and specification. After refilling, run the engine briefly and recheck the level. Properly filled gearboxes ensure smooth operation and prevent further damage.
Post-Repair Leak Check & Monitoring

Following any gearbox seal replacement, a thorough leak check is essential. Start the engine and let it idle for several minutes, carefully inspecting the repaired area for any signs of fresh oil. Run through all gears, observing for leaks while doing so.
Monitor the gearbox over the next few days, checking the oil level regularly. Look for oil spots where the vehicle is parked. Early detection of any renewed leakage allows for prompt re-evaluation and correction. Consistent monitoring ensures the repair’s effectiveness and prevents potential transmission damage from prolonged oil loss.
When to Seek Professional Help
Attempting complex gearbox repairs without adequate experience can lead to further damage. If you encounter significant difficulty removing seals or covers, or if you’re unsure about torque specifications, consult a qualified mechanic.
Persistent leaks after DIY repair, unusual noises emanating from the gearbox, or difficulty shifting gears are all indicators of a problem beyond your skillset. Ignoring these signs can result in costly transmission failure. Don’t hesitate to seek professional assistance; a skilled technician possesses the tools and expertise to diagnose and resolve intricate gearbox issues effectively and safely.
Preventing Future Gearbox Leaks
Proactive maintenance is key to long-term gearbox health and leak prevention. Adopt smooth shifting techniques and avoid aggressive clutch engagement, minimizing stress on seals. Regularly check the gearbox oil level and condition, replenishing or changing it according to the manufacturer’s recommendations – typically every 30,000 to 60,000 miles.
Inspect the gearbox for any signs of weeping or oil accumulation during routine vehicle maintenance. Addressing minor leaks promptly prevents them from escalating into major problems. Avoid overfilling the gearbox, as excessive pressure can contribute to seal failure. Consistent, careful driving habits and diligent upkeep significantly reduce the risk of future leaks.
Proper Driving Habits
Gentle operation significantly extends gearbox life and minimizes leak potential. Avoid “speed shifting” or aggressively slamming gears, as this creates excessive stress on internal components and seals. Smooth clutch engagement and disengagement are paramount; prevent abrupt releases that shock the system.
Refrain from “riding the clutch,” which generates unnecessary heat and wear. Downshift appropriately for engine braking, rather than relying solely on the brakes, reducing strain on the gearbox. Avoid prolonged idling in gear, especially on inclines. These mindful driving practices contribute to a healthier gearbox, reducing the likelihood of future seal failures and costly repairs.
Regular Gearbox Maintenance
Proactive maintenance is key to preventing gearbox leaks and ensuring longevity. Schedule routine gear oil changes according to the manufacturer’s recommendations – typically every 30,000 to 60,000 miles, or more frequently with heavy use. Inspect the gearbox for any signs of weeping or oil accumulation during these intervals.
Check the shift linkage for proper adjustment and smooth operation, as misalignment can contribute to internal stress. Address any unusual noises promptly, as they may indicate developing issues. Maintain detailed records of all maintenance performed. Consistent attention to these details will help identify potential problems early, preventing minor issues from escalating into major leaks and expensive repairs.
Cost Comparison: DIY vs. Professional Repair
DIY gearbox seal replacement can save significantly on labor costs. Parts – seals, gaskets, and gear oil – typically range from $50 to $200, depending on the vehicle and quality. However, DIY requires specialized tools (pullers, torque wrenches) adding $50-$150 to the initial investment. Time commitment is substantial, potentially a full weekend for a novice.
Professional repair costs vary widely, from $300 to $800+, including parts and labor. Benefits include expertise, warranty on work, and proper disposal of fluids. Consider your mechanical skill level, available tools, and the value of your time when deciding. A professional diagnosis can also pinpoint the exact leak source, avoiding unnecessary repairs.
Common Mistakes to Avoid During Gearbox Seal Replacement
Damaging the sealing surfaces is a frequent error; meticulous cleaning and inspection are vital. Incorrect seal installation – twisting, pinching, or insufficient lubrication – leads to immediate leaks. Forgetting to support the gearbox properly during removal can cause damage to the transmission housing. Using incorrect torque specifications on bolts can lead to warping or loosening.
Neglecting to replace the gear oil after seal replacement contaminates the new seals. Overlooking other worn components (bearings, bushings) during the process is a missed opportunity for comprehensive repair. Rushing the process increases the risk of errors; patience is key. Always double-check your work before reassembly!