General Electric Window Air Conditioner Manual: A Comprehensive Guide
This manual provides detailed instructions for installation‚ operation‚ maintenance‚ and troubleshooting of General Electric window air conditioning units‚ ensuring optimal performance.

General Electric (GE) window air conditioners are a popular choice for cooling individual rooms‚ offering convenience and efficiency. This guide serves as a comprehensive resource for owners‚ covering everything from initial setup to long-term maintenance. Understanding your unit’s features and following these instructions will maximize its performance and lifespan.
GE air conditioners are known for their reliability and user-friendly designs. This manual will help you navigate the control panel‚ understand error codes‚ and perform essential cleaning procedures. Proper care ensures consistent cooling and minimizes the need for repairs. We aim to provide clear‚ concise information for a seamless user experience.
Understanding Model Numbers
GE air conditioner model numbers are crucial for identifying specific features‚ specifications‚ and ordering the correct replacement parts. These alphanumeric codes contain valuable information about the unit’s capacity‚ functionality‚ and manufacturing details. Decoding the model number allows technicians‚ homeowners‚ and facility managers to accurately determine unit specifications and verify warranty eligibility.
The model number‚ typically found on the data sticker‚ is essential for accessing detailed product information. It’s a key component when searching for manuals‚ troubleshooting guides‚ or contacting customer support. Understanding this code streamlines the process of maintaining and repairing your GE air conditioning system effectively.

Locating the Model and Serial Number
Finding your GE air conditioner’s model and serial number is the first step towards accessing support‚ parts‚ or warranty information. These identifiers are typically located on a data sticker affixed to the unit. Specifically‚ you’ll find this sticker on the side of the condenser – the outdoor unit for central systems‚ or directly on the unit itself for window models.
This sticker contains vital details for identification and service. Keep this information readily available‚ as it’s frequently requested when contacting GE customer support or ordering replacement components. Accurate identification ensures you receive the correct assistance and parts for your specific model.
Where to Find the Data Sticker
For window units‚ the data sticker is generally located on the side panel of the air conditioner. Carefully inspect both sides‚ as placement can vary slightly between models. Look for a silver or white sticker with printed text‚ often containing model and serial number information‚ as well as voltage and amperage details.
On central air conditioning systems (heat pumps)‚ the sticker is typically found on the side of the outdoor condenser unit. It’s usually positioned for easy visibility without needing to remove any panels. This sticker is crucial for identifying your specific unit for repairs or parts replacement.
Decoding the Model Number Format
GE model numbers offer valuable insight into the unit’s specifications. Typically‚ the first three letters denote the type of appliance. Subsequently‚ the 5th and 6th digits (or 2nd and 3rd numbers after the initial letters) often indicate the unit’s size in tons. This is particularly useful for heat pumps and central air conditioners.
However‚ decoding can be complex as formats evolve. The remaining digits and letters specify features‚ manufacturing date‚ and other details; Consulting GE’s official documentation or contacting their support team can provide a precise breakdown for your specific model number.
Safety Precautions
Prioritize safety during installation and operation. Always disconnect power before cleaning or performing maintenance. Ensure the unit is securely mounted to prevent falls‚ potentially causing injury or damage. Never operate the air conditioner with a damaged cord or plug. Avoid inserting objects through the vents‚ as this could damage the internal components and create a hazard.
Furthermore‚ do not use extension cords. If the unit experiences issues‚ immediately disconnect power and consult a qualified technician. Keep flammable materials away from the air conditioner to prevent fire hazards. Proper grounding is essential for electrical safety.
Installation Guide
Proper installation is crucial for efficient operation. Begin by preparing the window‚ ensuring it’s structurally sound and can support the unit’s weight. Carefully mount the air conditioner‚ following the included brackets and hardware instructions. Secure the unit firmly to prevent movement or accidental falls‚ utilizing screws and side panels provided.
Verify the unit is level and properly sealed to prevent air leaks and water intrusion. Check for any obstructions that might impede airflow. Always adhere to local building codes and safety regulations during installation. A correctly installed unit maximizes cooling efficiency and longevity.
Preparing the Window
Before installation‚ thoroughly clean the window and surrounding area. Ensure the window frame is structurally sound and capable of supporting the air conditioner’s weight. Measure the window opening to confirm compatibility with the unit’s dimensions. Remove any existing screens or hardware that may interfere with installation.
Check for any gaps or cracks around the window frame and seal them with weather stripping or caulk to prevent air leaks. Verify the window sill is level and provides adequate support. Proper window preparation ensures a secure and efficient installation‚ maximizing cooling performance.
Mounting the Air Conditioner
Carefully lift the air conditioner and position it within the prepared window opening. Ensure the unit’s side panels align properly with the window frame. Gently slide the unit into place‚ supporting its weight throughout the process. Install the side accordion panels‚ extending them to fill the gaps between the unit and the window frame.
Confirm the unit is level using a spirit level and adjust as needed. Proper mounting is crucial for stability and efficient operation. Avoid forcing the unit‚ as this could damage the window or the air conditioner itself. Secure the unit following the instructions in the ‘Securing the Unit’ section.
Securing the Unit
Once mounted‚ secure the air conditioner to the window frame using the provided mounting brackets and screws. These brackets typically attach to the window sill or frame‚ providing additional support and preventing accidental displacement. Ensure the screws are tightened firmly‚ but avoid over-tightening‚ which could damage the window or brackets.
Consider adding foam insulation strips around the perimeter of the unit to create a tighter seal and improve energy efficiency. Regularly inspect the mounting hardware to confirm it remains secure‚ especially after periods of inclement weather. A properly secured unit ensures safe and reliable operation.
Operating Instructions
Before operation‚ ensure the air conditioner is properly installed and the power cord is securely plugged into a grounded outlet. The control panel allows for easy adjustment of settings. Familiarize yourself with the functions for power‚ temperature‚ fan speed‚ and mode selection (Cool‚ Fan‚ Dry).
Start by powering on the unit and selecting your desired temperature. Utilize the fan speed control to adjust airflow‚ and choose the appropriate mode based on your needs. Regularly check the filter for cleanliness to maintain optimal cooling performance and air quality.
Control Panel Overview
The control panel serves as the central hub for operating your GE window air conditioner. It typically features buttons or a digital display for power‚ temperature adjustment‚ fan speed selection (Low‚ Medium‚ High)‚ and mode control (Cool‚ Fan‚ Dry/Dehumidify). Some models include additional features like sleep mode or energy saver settings.
Understanding each button’s function is crucial for efficient operation. The temperature control allows precise setting of desired room temperature‚ while fan speed adjusts airflow intensity. Mode selection determines the unit’s primary function – cooling‚ circulating air‚ or reducing humidity.
Powering On and Off
To power on your GE window air conditioner‚ locate the “Power” button on the control panel and press it firmly. A light indicator will illuminate‚ confirming the unit is active. Ensure the unit is properly plugged into a grounded electrical outlet with the correct voltage.
To power off‚ simply press the “Power” button again. The indicator light will extinguish‚ and the unit will cease operation. Always turn off the air conditioner before unplugging it from the outlet to prevent potential electrical hazards or damage to the unit’s components.
Temperature Settings
Adjusting the temperature on your GE window air conditioner is straightforward using the control panel. Typically‚ there are “+” and “-” buttons to increase or decrease the desired room temperature. The set temperature will be displayed digitally on the control panel.
Lowering the temperature setting will cause the unit to cool more intensely‚ while raising it will reduce cooling output. Allow several hours for the room to reach the selected temperature; Remember‚ the unit won’t maintain a temperature below the lowest setting available.
Fan Speed Control

GE window air conditioners usually offer multiple fan speed settings – Low‚ Medium‚ and High – selectable via buttons on the control panel. The ‘Fan Only’ mode operates the fan without activating the cooling function‚ providing simple air circulation.
Lower fan speeds consume less energy and produce quieter operation‚ ideal for gentle airflow. Higher fan speeds maximize airflow for quicker cooling‚ but will be louder and use more power. Experiment to find the balance between comfort and energy efficiency that suits your needs. Some models also feature an ‘Auto’ fan speed.

Mode Selection (Cool‚ Fan‚ Dry)
GE air conditioners offer versatile operation through distinct modes. ‘Cool’ mode lowers room temperature by activating the compressor and fan‚ allowing for temperature adjustments. ‘Fan’ mode circulates air without cooling‚ useful for ventilation. The ‘Dry’ mode (Dehumidify) reduces humidity by slowly cooling the air‚ extracting moisture‚ and is ideal for damp environments.
Selecting the appropriate mode optimizes performance and comfort. ‘Cool’ is for active cooling‚ ‘Fan’ for air movement‚ and ‘Dry’ for humidity control. Understanding these modes ensures efficient and effective use of your GE unit.
Maintenance and Cleaning
Regular maintenance extends the life and efficiency of your GE window air conditioner. Filter cleaning is crucial – remove and wash the filter every two weeks‚ or more often in dusty environments‚ to maintain airflow. Coil cleaning annually removes dust and debris‚ improving cooling performance; use a coil cleaner specifically designed for air conditioners.
Exterior cleaning involves wiping down the unit with a damp cloth. Proper cleaning ensures optimal operation‚ prevents breakdowns‚ and maintains air quality. Always disconnect power before any maintenance or cleaning procedures.

Filter Cleaning
Maintaining a clean filter is paramount for efficient operation. Remove the filter‚ typically located behind the front grille‚ every two weeks‚ or more frequently if you have pets or live in a dusty area. Wash the filter with mild soap and water‚ ensuring it’s completely dry before reinstalling. A clogged filter restricts airflow‚ reducing cooling capacity and increasing energy consumption.
Regular filter cleaning also improves indoor air quality. Inspect the filter for damage and replace it if necessary. A clean filter contributes to the longevity and performance of your GE air conditioner.
Coil Cleaning
Periodically cleaning the condenser and evaporator coils enhances cooling efficiency. Disconnect power before cleaning. Use a vacuum cleaner with a brush attachment to gently remove dust and debris from the coils‚ located on both the indoor and outdoor sections of the unit. Avoid bending the fins‚ as this reduces airflow.
Special coil cleaner solutions are available for more thorough cleaning‚ but follow the product instructions carefully. Clean coils improve heat transfer‚ lowering energy costs and extending the lifespan of your GE air conditioner. Ensure coils are completely dry before restoring power.
Exterior Cleaning
Regularly cleaning the exterior of your GE window air conditioner maintains its appearance and prevents buildup that can affect performance. Use a mild soap and water solution with a soft cloth to wipe down the cabinet. Avoid abrasive cleaners or solvents‚ as they can damage the finish.
Pay attention to the front grille‚ removing any accumulated dust or debris. Ensure all cleaning solutions are thoroughly rinsed off and the unit is completely dry before restoring power. A clean exterior contributes to the overall longevity and efficient operation of your cooling appliance.
Troubleshooting Common Issues
Encountering problems with your GE window air conditioner is common. If the unit isn’t cooling‚ check the filter‚ ensure proper settings‚ and verify the condenser isn’t blocked. Water leaks often indicate improper installation or a clogged drain line – address these promptly.

Noisy operation could stem from loose parts or an uneven installation. Error codes displayed on the control panel signal specific issues; consult the manual for their meanings. Addressing these concerns quickly can prevent further damage and restore optimal cooling performance.
Unit Not Cooling
If your GE window AC isn’t cooling effectively‚ begin by inspecting the air filter – a dirty filter restricts airflow. Confirm the temperature settings are appropriately low and the unit is set to ‘Cool’ mode. Examine the condenser coils located on the outdoor side; ensure they are free from debris and obstructions.
Verify the unit isn’t overloaded‚ and the window is properly sealed to prevent warm air infiltration. A malfunctioning compressor could also be the cause‚ requiring professional attention. Regularly checking these elements ensures optimal cooling performance.
Water Leaks
Water leaks from your GE window air conditioner often indicate a clogged drain line. Locate the drain plug (usually at the rear of the unit) and carefully clear any blockages with a flexible wire or pipe cleaner. Ensure the unit is slightly tilted outwards to facilitate proper drainage.
Improper installation‚ where the unit isn’t level or isn’t correctly sealed‚ can also cause leaks. Inspect the window seal and re-seal if necessary. If leaks persist‚ a damaged drain pan might be the issue‚ requiring professional repair or replacement.
Noisy Operation
Excessive noise from your GE window air conditioner can stem from several sources. First‚ ensure the unit is securely mounted and all mounting hardware is tightened‚ as vibrations can amplify sounds. Check for obstructions‚ like debris or leaves‚ near the fan blades. A loose fan blade or a failing fan motor can also cause rattling or humming.
Internal components‚ such as the compressor‚ may produce noise during operation‚ but unusually loud or grinding sounds warrant professional inspection. Verify the unit is level; an uneven installation can exacerbate vibrations and noise levels.
Error Codes and Their Meanings
GE window air conditioners utilize error codes to signal malfunctions‚ aiding in diagnosis and repair. While specific codes vary by model‚ common errors include “E1” indicating a sensor failure‚ often related to temperature readings. “E2” frequently points to a compressor issue‚ potentially requiring professional service. “E3” can signify a fan motor problem‚ impacting airflow.
Consult your specific model’s documentation for a complete list of error codes and their corresponding solutions. Ignoring error codes can lead to further damage. If an error persists after troubleshooting‚ contact authorized GE service for assistance.
Parts Identification
Key components of your GE window air conditioner include the electronic control board‚ responsible for managing operations like temperature and fan speed. The compressor circulates refrigerant‚ enabling cooling‚ while the fan motor drives airflow across the cooling coils. Other vital parts are the condenser and evaporator coils‚ the filter‚ and the chassis.
Understanding these parts aids in troubleshooting and repair. Replacement parts should match your specific model number for compatibility. Always disconnect power before attempting any disassembly or part replacement. Refer to diagrams in this manual or online resources for visual identification.
Electronic Control Board
The electronic control board is the “brain” of your GE window air conditioner‚ meticulously managing essential functions. It regulates temperature settings‚ adjusts fan speed‚ and controls the mode selection (cool‚ fan‚ dry). This vital component receives input from sensors and user controls‚ then directs operation accordingly.
Troubleshooting often begins with inspecting the control board for damage. A faulty board can cause erratic behavior or complete failure. Replacement requires careful matching of the part number to your specific model. Always disconnect power before handling or inspecting this sensitive component.
Compressor
The compressor is the heart of your GE air conditioner‚ responsible for circulating refrigerant and enabling the cooling process. It pressurizes the refrigerant‚ allowing it to absorb heat from inside your room and release it outdoors. A failing compressor is often indicated by a lack of cooling or unusual noises.
Compressor issues typically require professional diagnosis and repair due to the sealed system and specialized tools needed. Attempting DIY repairs can be dangerous and void your warranty. Regular maintenance‚ like keeping the condenser coils clean‚ can extend the compressor’s lifespan.
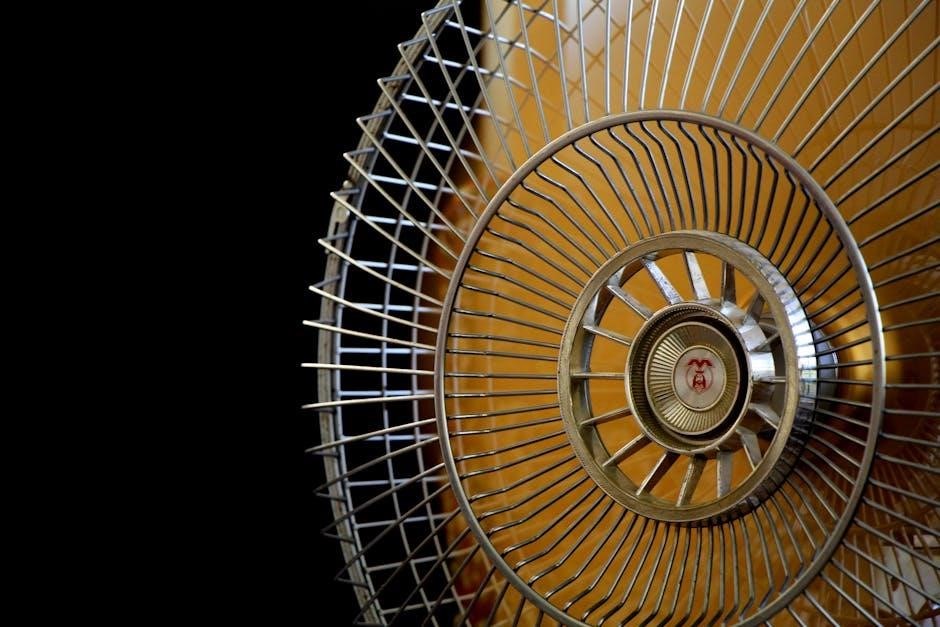
Fan Motor
The fan motor powers both the indoor blower fan and the outdoor condenser fan‚ crucial for airflow and heat exchange within your GE air conditioner. The blower fan distributes cooled air into the room‚ while the condenser fan dissipates heat outside. A malfunctioning fan motor can lead to reduced cooling efficiency or complete airflow stoppage.
Symptoms of a failing fan motor include unusual noises‚ slow fan speed‚ or the fan not running at all. While some minor issues might be addressable‚ significant motor problems usually necessitate professional repair or replacement to ensure optimal performance and prevent further damage.
Warranty Information
GE air conditioners are typically covered by a manufacturer’s warranty‚ protecting against defects in materials and workmanship. Warranty duration varies depending on the model and specific terms‚ often ranging from one to five years for parts and labor. It’s crucial to register your appliance promptly after purchase to activate warranty coverage.
The warranty generally excludes damage caused by improper installation‚ misuse‚ accidents‚ or normal wear and tear. Keep your proof of purchase and warranty documentation readily available for any potential claims. Refer to the included warranty card or the GE Appliances website for complete details.
Finding Replacement Parts
Locating replacement parts for your GE window air conditioner is essential for repairs. Online resources‚ such as the official GE Appliances parts store and reputable appliance parts retailers‚ offer a wide selection. Having your model number readily available is crucial for accurate part identification.
Authorized GE dealers can also assist in sourcing parts and providing professional repair services. When ordering‚ verify compatibility with your specific model to ensure a proper fit and function. Consider searching using both the model and serial number for precise results‚ maximizing repair success.
Online Resources
Numerous online platforms facilitate finding GE air conditioner parts. The official GE Appliances website provides a dedicated parts store with diagrams and model-specific listings. Retailers like AppliancePartsPros and RepairClinic offer extensive catalogs and search tools‚ often utilizing serial number decoding for accuracy.
Online forums and communities dedicated to appliance repair can offer valuable advice and part sourcing tips from experienced users. Remember to verify the seller’s reputation and return policies before purchasing. Utilizing these resources streamlines the process of acquiring necessary components.
Authorized GE Dealers
Locating authorized GE dealers ensures access to genuine parts and qualified service technicians. GE’s website features a dealer locator tool‚ allowing you to find nearby retailers specializing in GE appliances. These dealers offer expert assistance in identifying the correct replacement parts based on your unit’s model and serial number.
Benefits of using authorized dealers include warranty support‚ professional installation services‚ and access to the latest GE product information. They can also provide guidance on troubleshooting complex issues and offer preventative maintenance advice‚ maximizing your air conditioner’s lifespan.
Vintage GE Air Conditioner Model Numbers
Understanding older GE air conditioner model numbers is crucial for parts identification and repair; Vintage models utilize a different numbering system than current units‚ often lacking the standardized format found today. These codes can be complex‚ requiring careful decoding to determine the unit’s specifications and manufacturing date.
Resources for decoding vintage numbers include online forums dedicated to appliance repair and historical GE documentation. Identifying the correct model number allows you to source compatible replacement parts and access relevant service manuals‚ ensuring proper restoration and functionality of your classic GE air conditioner.
Using Serial Numbers for Identification
GE serial numbers are vital for pinpointing your air conditioner’s exact specifications and manufacturing details. While model numbers offer a general overview‚ serial numbers provide a unique identifier for each unit. This information is crucial when ordering replacement parts or verifying warranty coverage.
The process involves decoding the serial number‚ then searching databases to identify the manufacturer and specific model. Algorithms utilize this data to uncover additional details about your appliance. Though a universal decoder doesn’t exist‚ leveraging online resources and contacting GE directly can unlock the secrets hidden within your unit’s serial number.
Understanding BTU Ratings
BTU (British Thermal Unit) ratings indicate an air conditioner’s cooling capacity. A higher BTU means greater cooling power‚ suitable for larger spaces. Selecting the correct BTU is crucial; too low‚ and the unit struggles to cool effectively. Too high‚ and it may cycle on and off frequently‚ reducing efficiency and comfort.
GE air conditioners offer various BTU options to match room size. Consider factors like square footage‚ insulation‚ and sun exposure when determining the appropriate BTU rating for your needs. Proper BTU selection ensures optimal performance and energy savings‚ maximizing your cooling investment.
Air Conditioner Size in Tons
Air conditioner size is often expressed in “tons‚” where one ton equals 12‚000 BTU. This measurement helps quantify cooling capacity‚ particularly for central air systems and larger units. GE heat pumps and air conditioners utilize this metric for specification. Determining your unit’s size in tons involves examining the model number located on the data sticker of the condenser (outdoor unit).
Specifically‚ focus on the 5th and 6th digits – the 2nd and 3rd numbers following the initial three letters – to ascertain the tonnage. Understanding this allows for accurate part ordering and system evaluation.
Determining the Size of Your GE Unit
Accurately sizing your GE air conditioner is crucial for efficient cooling and energy savings. Begin by locating the data sticker on the side of the condenser (outdoor unit). This sticker contains vital information‚ including the model number. Focus on the 5th and 6th digits within the model number – these represent the unit’s size in tons.
Remember‚ one ton equates to 12‚000 BTU. This method provides a quick and reliable way to determine your unit’s cooling capacity without complex calculations. Correct sizing ensures optimal performance and prevents unnecessary energy consumption.
Energy Efficiency Tips
Maximize your GE air conditioner’s efficiency and minimize energy costs with these simple tips. Regularly clean the air filter – a dirty filter restricts airflow‚ forcing the unit to work harder. Ensure windows and doors are properly sealed to prevent cool air from escaping. Utilize the “Energy Saver” mode‚ if available‚ to optimize cooling and reduce energy consumption.
Consider using a programmable thermostat to automatically adjust temperatures when you’re away or asleep. Avoid direct sunlight exposure on the unit‚ and keep the surrounding area clear for optimal airflow. These practices contribute to lower energy bills and a more comfortable environment.
Disposal and Recycling
Responsible disposal of your GE window air conditioner is crucial for environmental protection. Do not simply discard the unit with regular trash. Many components contain refrigerants and materials requiring specialized handling. Contact your local waste management authority for information on proper disposal procedures and recycling options.
GE encourages recycling whenever possible. Some retailers offer take-back programs for old appliances. Alternatively‚ search for local recycling centers that accept air conditioners. Proper disposal prevents harmful substances from entering the environment and supports sustainable practices.