
KitchenAid Ice Cream Recipe Book PDF: A Comprehensive Guide
Finding a KitchenAid ice cream recipe book PDF for free requires careful searching‚ prioritizing legal and safe download sources to avoid malware․
Understanding the Demand for Free PDFs
The surge in demand for KitchenAid ice cream recipe book PDFs stems from several factors․ Firstly‚ the KitchenAid ice cream maker attachment is a popular kitchen gadget‚ inspiring home cooks to experiment․ Secondly‚ PDFs offer convenient‚ portable access to recipes‚ eliminating the need for physical cookbooks․
Many users actively seek “KitchenAid ice cream recipe book PDF free download” options‚ driven by budget constraints or a desire for instant access․ The appeal of readily available‚ digital resources is undeniable‚ especially for beginners eager to learn the art of homemade ice cream․ However‚ this demand also creates risks associated with illegitimate downloads․
Legality and Safety of Downloading PDFs
Downloading KitchenAid ice cream recipe book PDFs from unofficial sources carries legal and security risks․ Copyright laws protect published works‚ meaning unauthorized distribution is illegal․ More critically‚ free PDF downloads from untrusted websites often harbor malware‚ viruses‚ or phishing attempts․
These malicious files can compromise your device and personal information․ Always prioritize official sources like the KitchenAid website or reputable online bookstores․ Exercise extreme caution when encountering “KitchenAid ice cream recipe book PDF free download” offers‚ verifying the website’s legitimacy before proceeding․ Protecting your digital security is paramount․
Where to Search for KitchenAid Ice Cream Recipe PDFs
Locating KitchenAid ice cream recipe PDFs requires strategic searching․ Begin with the official KitchenAid website; they sometimes offer downloadable resources․ Explore online ice cream making communities and forums – members often share recipes and links․ Reputable cooking websites and blogs may also host KitchenAid-compatible recipes in PDF format․
However‚ be wary of sites promising a “KitchenAid ice cream recipe book PDF free download” without clear sourcing․ Utilize advanced Google searches (e․g․‚ “filetype:pdf KitchenAid ice cream”) to refine results․ Always scan downloaded files with antivirus software before opening․
Preparing for KitchenAid Ice Cream Making
Success hinges on a fully frozen bowl (24 hours!)‚ chilled ingredients‚ and having essential KitchenAid attachments ready for optimal ice cream creation․
Essential KitchenAid Attachments
The primary attachment is‚ of course‚ the KitchenAid ice cream maker bowl itself – ensure you have a compatible model for your stand mixer․ Beyond that‚ a sturdy whisk attachment can be incredibly useful for thoroughly combining your ice cream base ingredients before churning․
Having a flexible edge scraper is also highly recommended; it helps scrape down the sides of the bowl during mixing and efficiently transfer the finished ice cream to a freezer-safe container․ Finally‚ consider a digital thermometer to precisely monitor ingredient temperatures‚ crucial for achieving the smoothest texture․ These tools elevate your ice cream-making experience!
Freezing the Bowl: The 24-Hour Rule
Achieving optimal freezing of your KitchenAid ice cream maker bowl is paramount for successful churning․ While some instructions suggest 15 hours‚ a full 24 hours – or even longer – is strongly recommended to ensure the bowl is thoroughly frozen solid․ This prevents a soupy consistency and guarantees proper ice cream formation․
Always “overshoot” the freezing time; a well-frozen bowl is the key to creamy results․ Remember‚ the colder everything is‚ the smaller the ice crystals will be‚ leading to a smoother‚ more scoopable final product․ Don’t rush this crucial step!
Importance of Ingredient Temperature
Maintaining consistently cold ingredients is vital for superior ice cream texture․ After preparing your ice cream mix‚ refrigerate it overnight – the colder‚ the better! This drastically reduces ice crystal formation during the churning process‚ resulting in a smoother‚ creamier final product․
The goal is to start with ingredients as close to freezing as possible without actually freezing them․ This temperature difference maximizes the churning efficiency and minimizes the size of ice crystals․ Cold ingredients work synergistically with the frozen bowl for optimal results․
Key Ingredients for Creamy Ice Cream
Heavy cream provides richness‚ while the right sugar balances sweetness and texture; quality vanilla extract elevates flavor‚ creating a delightful ice cream base․
The Role of Heavy Cream
Heavy cream is absolutely fundamental to achieving that luxuriously smooth and creamy texture in homemade ice cream․ Its high fat content—typically 36% or higher—is the key․ This fat interferes with ice crystal formation‚ resulting in a smaller crystal size and a noticeably smoother mouthfeel․
Lower fat content creams will produce a more icy result․ When using KitchenAid attachments‚ the quality of the cream directly impacts the churning process and final product․ Don’t substitute with half-and-half or milk; the fat is non-negotiable for true ice cream indulgence․ A richer cream base also allows flavors to carry better․
Choosing the Right Sugar
Sugar isn’t just about sweetness in ice cream; it significantly impacts texture and freezing point․ Granulated sugar is the most common choice‚ providing a clean sweetness and contributing to a smooth consistency․ However‚ consider using a blend!
Some recipes benefit from a portion of corn syrup or dextrose‚ which further inhibit ice crystal formation‚ resulting in a softer scoop․ Avoid powdered sugar‚ as it contains cornstarch which can affect the texture․ The colder your mix is‚ the lesser ice crystals will form‚ so proper sugar dissolution is vital for optimal KitchenAid churning․
Vanilla Extract: Quality Matters
Vanilla extract is far more than just a flavoring; it enhances the overall perception of creaminess and depth in your ice cream․ Don’t skimp here! Opt for pure vanilla extract‚ not imitation․ Imitation vanilla lacks the complex flavor compounds found in the real deal‚ resulting in a flat taste․
High-quality vanilla extract will provide a richer‚ more aromatic experience․ Consider using vanilla bean paste for an even more intense vanilla flavor and visible specks․ Remember‚ a cold mix is key‚ and quality ingredients like vanilla elevate the final product when using your KitchenAid attachment․
Enhancing Texture and Preventing Ice Crystals
Stabilizers like xanthan gum‚ guar gum‚ or carob gum minimize ice crystal formation‚ yielding a smoother‚ more scoopable ice cream texture with your KitchenAid․
Xanthan Gum: A Game Changer
Xanthan gum is a remarkably effective stabilizer for homemade ice cream‚ dramatically improving its texture and preventing the formation of large‚ undesirable ice crystals․ Typically‚ only a small amount – between ½ to 1 teaspoon per batch – is needed to achieve noticeable results․ You can usually find it alongside baking ingredients‚ often near Bob’s Red Mill products in the grocery store․
This additive doesn’t just enhance smoothness; it also extends the ice cream’s shelf life and makes it significantly easier to scoop directly from the freezer․ Many commercial ice cream manufacturers utilize similar stabilizers‚ so incorporating xanthan gum allows you to replicate that professional quality at home with your KitchenAid․
Guar Gum and Carob Gum Alternatives
Guar gum and carob gum present viable alternatives to xanthan gum for stabilizing homemade ice cream‚ offering similar benefits in texture and preventing ice crystal formation․ Both are plant-based‚ all-natural additives‚ alleviating concerns about artificial ingredients․ They function by increasing viscosity‚ resulting in a smoother‚ more scoopable final product․
While xanthan gum is often preferred for its consistency‚ guar or carob gum can be substituted if xanthan isn’t available․ Dosage is comparable – use roughly the same amount as you would xanthan gum․ These gums contribute to a familiar ice cream texture and improve freezer stability‚ ensuring a delightful experience․
Understanding Stabilizers in Ice Cream
Stabilizers‚ like gums‚ are crucial in ice cream making‚ preventing ice crystal growth and ensuring a consistently smooth texture․ Commercial ice cream heavily relies on them for prolonged freezer life and optimal scoopability․ Without stabilizers‚ homemade ice cream tends to become icy and grainy over time․
These additives bind water molecules‚ reducing the size of ice crystals formed during freezing․ Common options include xanthan gum‚ guar gum‚ and carob gum – all plant-derived․ Using even a small amount significantly improves the final product’s quality‚ mimicking the texture of store-bought varieties and enhancing overall enjoyment․
Mastering the Churning Process
Optimal churning time varies‚ but watch for a soft-serve consistency; over-churning leads to a grainy texture‚ while under-churning results in icy crystals․
Optimal Churning Time
Determining the perfect churning duration is crucial for achieving ideal ice cream texture․ Generally‚ KitchenAid ice cream makers require between 20 to 30 minutes‚ but this is merely a guideline․ Don’t solely rely on time; observe the mixture’s consistency closely․
Initially‚ it will resemble a soft-serve‚ and that’s your cue! Continuing to churn beyond this point can lead to overworking‚ resulting in a grainy‚ less-desirable final product․ Conversely‚ stopping too soon leaves you with a slushy‚ icy concoction․ The ideal consistency is thick‚ smooth‚ and holds its shape‚ but remains scoopable․
Remember‚ ingredient temperature and the recipe itself influence churning time‚ so adjust accordingly․
Recognizing the Perfect Consistency
Achieving the right consistency is paramount for creamy‚ scoopable ice cream․ As your KitchenAid churns‚ monitor the mixture’s transformation․ It begins liquid‚ then thickens‚ resembling soft-serve – this is a key indicator․
The perfect consistency isn’t about a specific time‚ but rather the texture․ It should pull away from the sides of the bowl‚ forming soft peaks when the paddle lifts․ It will have increased in volume and appear fluffy․
Avoid over-churning‚ which leads to a grainy texture․ Under-churning results in a soupy consistency․ Trust your visual and tactile assessment – a smooth‚ thick‚ and slightly yielding texture signifies perfection!
Post-Churning Procedures
Immediately transfer churned ice cream to a freezer-safe container and clean the bowl with cold water to maintain optimal freezing performance․
Container Selection for Freezing
Choosing the right container is vital for preserving your KitchenAid ice cream’s texture․ Opt for shallow‚ airtight containers rather than deep ones; this minimizes ice crystal formation․ Plastic or stainless steel containers work well‚ but avoid those that absorb odors․ Pre-chill the container in the freezer for at least 30 minutes before transferring the ice cream․
Press plastic wrap directly onto the surface of the ice cream before sealing with a lid to prevent air exposure․ This simple step significantly reduces ice crystal development and maintains a creamy consistency․ Remember‚ proper storage extends the life and quality of your homemade treat!
Immediate Bowl Cleaning: Why It’s Crucial
Promptly cleaning your KitchenAid freezer bowl after each use is absolutely essential․ Even if still frozen‚ residue left behind diminishes its cooling capacity over time․ Use cold water and a gentle detergent‚ employing a soft cloth or your fingers to remove all traces of ice cream․
Rinse thoroughly‚ flip to drain excess water‚ and dry quickly to prevent refreezing droplets․ Delaying cleaning allows residue to harden‚ requiring more effort and potentially compromising future freezing performance․ Maintaining a pristine bowl ensures consistently creamy results!
Maintaining the Freezer Bowl’s Cooling Ability
The freezer bowl’s ability to stay intensely cold is paramount for successful ice cream making․ Avoid temperature fluctuations; never use hot water during cleaning‚ as this can damage the internal freezing liquid․ Repeatedly warming and refreezing the bowl drastically reduces its efficiency․
Always return the thoroughly dried bowl to the freezer immediately after cleaning․ Consistent‚ prolonged freezing maintains optimal performance․ Over time‚ the cooling ability will naturally diminish‚ but proper care significantly extends its lifespan‚ ensuring consistently creamy ice cream batches․

Popular KitchenAid Ice Cream Recipes
Classic vanilla ice cream serves as an excellent starting point‚ easily adaptable for chocolate or strawberry variations using your KitchenAid attachment․
Classic Vanilla Ice Cream Recipe
This vanilla ice cream recipe is a fantastic base for your KitchenAid stand mixer attachment‚ delivering a timeless flavor․ Begin with 2 cups of heavy cream‚ ensuring it’s thoroughly chilled․ Add 1 cup of whole milk and ¾ cup of granulated sugar‚ stirring until dissolved․ Incorporate 1 tablespoon of vanilla extract – quality truly matters here!
For enhanced texture‚ consider adding ½ to 1 teaspoon of xanthan gum․ This prevents ice crystal formation‚ resulting in a smoother‚ scoopable consistency․ Pour the mixture into your KitchenAid freezer bowl and churn for 20-25 minutes‚ or until it reaches a soft-serve consistency․ Transfer to a freezer-safe container and freeze for at least 2 hours before enjoying!
Chocolate Ice Cream Variations
Elevate your KitchenAid ice cream with delightful chocolate twists! Start with the classic vanilla base‚ then melt 4 ounces of dark chocolate into the warm cream mixture before chilling․ For a richer experience‚ add 2 tablespoons of cocoa powder alongside the melted chocolate․
Experiment with mix-ins: chocolate chips‚ brownie pieces‚ or even a swirl of fudge sauce․ A pinch of xanthan gum remains crucial for preventing ice crystals․ Remember to chill the base overnight for optimal results․ Churn as usual‚ and enjoy a decadent chocolate treat! Don’t forget immediate bowl cleaning for continued freezing success․
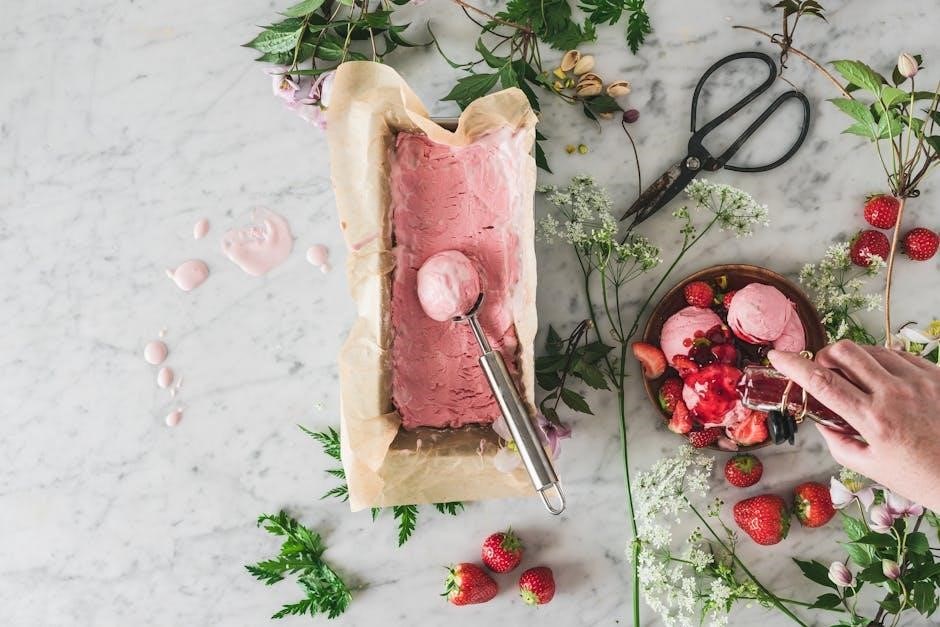
Strawberry Ice Cream: A Fruity Delight
Create a vibrant strawberry ice cream using your KitchenAid! Begin with a vanilla base‚ then puree 1 pound of fresh strawberries․ Gently fold the puree into the chilled cream mixture․ For intensified flavor‚ macerate the strawberries with a tablespoon of sugar beforehand․
A touch of lemon juice enhances the strawberry’s brightness․ Remember the importance of xanthan gum for a smooth texture․ Churn until it reaches a soft-serve consistency․ Enjoy this refreshing treat‚ and promptly clean your freezer bowl to maintain its cooling power for future fruity creations!
Troubleshooting Common Issues
Addressing issues like ice crystals or inconsistent texture is key; ensure proper freezing‚ ingredient temperature‚ and consider stabilizers like xanthan gum․
Ice Crystals: Causes and Solutions
Ice crystals form due to slow freezing and large water molecule clusters‚ resulting in a grainy texture․ The primary cause is insufficient chilling of the bowl – always exceed the recommended 15-hour freeze time‚ aiming for a full 24 hours or more․
Ingredient temperature also plays a vital role; ensure your ice cream base is thoroughly chilled overnight before churning․ Incorporating stabilizers like xanthan gum (½ to 1 teaspoon) or guar gum effectively binds water‚ minimizing crystal formation and yielding a smoother‚ scoopable consistency․
Faster churning and colder temperatures equate to smaller ice crystals‚ enhancing the overall creamy texture․ Remember‚ ice crystals are the enemy of perfect ice cream!
Ice Cream Too Hard or Too Soft
If your ice cream is excessively hard‚ it likely indicates insufficient fat content or too little sugar in the recipe․ Adding more heavy cream or a touch of corn syrup can help․ Conversely‚ overly soft ice cream suggests too much liquid or not enough churning time․
Ensure your freezer is set to the correct temperature (around -18°C or 0°F)․ Stabilizers like xanthan gum also contribute to a better texture‚ preventing both hardness and softness․ Remember‚ a properly churned mixture should resemble soft-serve before freezing․
Adjusting ingredient ratios and churning duration are key to achieving the ideal consistency․
Motor Overheating: Prevention and Solutions
KitchenAid mixers can overheat during extended ice cream churning due to the thick mixture’s strain on the motor․ Prevention starts with ensuring ingredients are thoroughly chilled – overnight refrigeration is crucial․ Avoid overloading the bowl; follow recipe capacities closely․
If overheating occurs‚ immediately stop the mixer and allow it to cool completely (30-60 minutes) before resuming․ Never force the motor․ Using a lower speed setting can also reduce strain․ Regularly check the motor housing for excessive heat during churning․
Proper preparation and mindful operation are vital for preventing motor issues․

Advanced Techniques
Explore beyond basic flavors! KitchenAid allows sorbet and gelato creation‚ demanding adjusted recipes and techniques for unique‚ delightful frozen desserts․
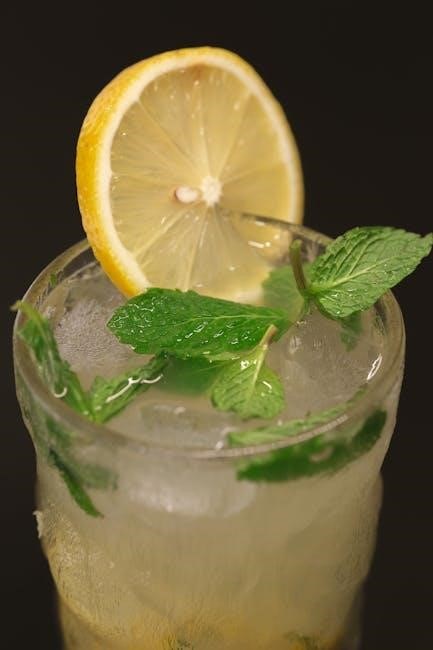
Making Sorbet with Your KitchenAid
Sorbet‚ a refreshing dairy-free frozen treat‚ is surprisingly easy to create with your KitchenAid attachment․ Unlike ice cream‚ sorbet relies on fruit puree and sugar for its base‚ requiring a slightly different approach․ Begin with a simple syrup – equal parts sugar and water‚ heated until dissolved‚ then cooled․
Next‚ blend your chosen fruit (berries‚ mangoes‚ peaches work wonderfully!) into a smooth puree․ Combine the cooled simple syrup with the fruit puree‚ and a touch of lemon juice to brighten the flavors․ Churn in your frozen KitchenAid bowl‚ monitoring for a slushy‚ yet firm consistency․ Sorbet typically churns faster than ice cream‚ so keep a close watch!
Creating Gelato: A Different Texture
Gelato‚ the Italian cousin of ice cream‚ boasts a denser texture and more intense flavor․ Achieving this with your KitchenAid requires adjusting the recipe and churning process․ Gelato typically uses more milk than cream‚ resulting in lower fat content․ Egg yolks are also crucial‚ providing richness and stability․
When making gelato‚ aim for a slower churn speed to incorporate less air․ This creates that signature dense texture․ Monitor closely; gelato is done when it’s thick and smooth‚ resembling soft-serve․ Remember‚ proper ingredient temperature is even more vital for gelato’s success!
Experimenting with Flavors and Mix-Ins
KitchenAid ice cream making truly shines with flavor exploration! Don’t limit yourself to vanilla or chocolate․ Infuse your base with spices like cinnamon or cardamom․ Purees of fruits – strawberries‚ mangoes‚ peaches – add vibrant tastes․ Consider extracts beyond vanilla‚ such as almond or peppermint․
Mix-ins elevate the experience․ Chocolate chips‚ crushed cookies‚ nuts‚ and even swirls of caramel or fruit compote are fantastic․ Add these during the last few minutes of churning for even distribution․ Remember‚ a little xanthan gum helps maintain texture with added ingredients!
Resources and Further Learning
Explore the KitchenAid website and online communities for recipes and tips; Beyond PDFs‚ consider dedicated ice cream recipe books for expanded knowledge!
Official KitchenAid Website
The official KitchenAid website (kitchenaid․com) is the premier source for information regarding your ice cream maker attachment․ While a dedicated‚ free PDF recipe book download isn’t always prominently featured‚ the site boasts a substantial collection of ice cream‚ sorbet‚ and gelato recipes directly compatible with your appliance․

You’ll discover detailed instructions‚ ingredient lists‚ and helpful videos demonstrating proper usage and maintenance․ Regularly check their recipe section as new content is added seasonally․ Furthermore‚ explore the support section for troubleshooting guides and FAQs related to the ice cream maker attachment‚ ensuring optimal performance and delicious results․ Don’t overlook the user manuals available for download!
Online Ice Cream Making Communities
Numerous online communities dedicated to ice cream making offer a wealth of knowledge and shared resources․ Forums like Reddit’s r/icecream and dedicated Facebook groups are excellent places to find user-submitted KitchenAid ice cream recipes‚ often shared as PDF documents or links to external sites․
These platforms facilitate discussions on techniques‚ troubleshooting‚ and ingredient sourcing․ Members frequently share their experiences and modifications to existing recipes‚ providing valuable insights․ Be mindful of verifying recipe sources and practicing safe downloading habits when accessing PDF files from external links within these communities․
Recommended Ice Cream Recipe Books (Beyond PDF)
While seeking a KitchenAid ice cream recipe book PDF is convenient‚ expanding your resources with physical books unlocks deeper knowledge․ “The Perfect Ice Cream” by David Lebovitz offers detailed explanations of techniques and flavor combinations․ Jeni Britton Bauer’s “Jeni’s Splendid Ice Creams” is renowned for its unique and innovative recipes‚ focusing on stabilizer usage․
These books provide a comprehensive understanding of ice cream science‚ going beyond simple recipes․ They often include detailed explanations of ingredient functions and troubleshooting tips‚ enhancing your skills beyond what a free PDF might offer․ Investing in these resources elevates your ice cream-making journey․